
Body repair page 8A |
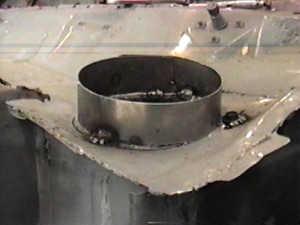

This sequence of pictures show the repair of the cowl vents. The top picture
shows the new cut out before the top hat was welded in place. I reinstalled the
heater to make certain we placed the hole in the right location. We then
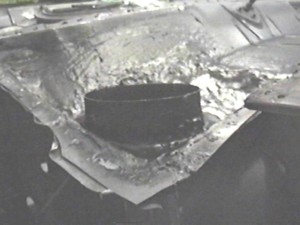
bent up around the opening a 1/4" lip. The second picture shows the top hat tack welded in place. We also located the vent housing in the car, underneath for location and also welded in 3 bolts to take the place of the studs that originally held the vent in place. The third picture shows the area seam sealed. We then painted and undercoated the entire panel with a good rubberized undercoating. The fourth picture shows the passenger side vent with the same treatment . We did make a mistake on this side ,however as the water would make a shallow puddle to the rear of this patch. Instead of ripping it out we sealed the seams and used some plastic filler to elavate the rear. We then went over the entire area with fibergass cloth and resin. Then we seam sealed the edges again , painted and undercoated. We then tested the whole cowl with WATER!! No Leaks!!! |